Showing posts with label foraging. Show all posts

Monday, June 2, 2014

Garden Update: Week of 5/25/14

Wow, what a busy week it has been at our house...
Memorial Day charity walk, dance rehearsals and recitals, last day of school, awards ceremony, gymnastics practice, a theater play, pine car derby and oh, yeah gardening.

Despite our busy schedules we were able to get some more of the garden planted...
Jalapeños, sweet corn, popcorn, decorative corn, sugar snap peas, green beans, spinach, broccoli, garlic, horseradish, onions, cucumbers, pickles, watermelons, carrots and quinoa.

And we planted the saddest tomato plants I have ever seen. We found 3 huge, but neglected tomato plants at Aldi's, for 50 cents total. The nurse in me is hoping to bring them back to health. Our tomato plant total is now at 32 (we may need some reinforcements when these are all ready to be harvested and preserved).

Our evenings are falling back into our summer routine, which brings Ron outside after dinner to water the garden. We are hoping to use mostly drip irrigation on the garden but there is a back corner that is getting the sprinkler treatment for the moment. Drip irrigation helps to create wider and deeper roots and makes your plants healthier. 

Here is a peak at the wildlife gracing our yard this past week:


Here is a recap of what else you might have missed from the week:

http://www.sustainableblessings.com/2014/06/foraging-and-preserving-ramps.html

Sunday, June 1, 2014

Foraging and Preserving Ramps

There is such a wonderful feeling that comes with finding your own food out in the "wild". It is like you are so lucky to find this tasty treat out in the wilderness just waiting for you. I was not brought up foraging but I have quickly learned to love it. It brings together many things I love: frugality, nature and spending time with my family. Just recently our family had a great time foraging for ramps and here are a few tips to help guide your efforts.


Ramps (Allium tricoccum) go by the name ramsons, wild garlic, wild leeks or spring leeks and have become widely popular in the last few years. They have a wonderful flavor combination of garlic and onion. These plants offer a wide variety of uses from the bulbs to leaves.


Ramps have 1 to 2 broad, smooth, light green leaves that progress into deep purple or burgundy coloring down the stems into the white bulbs. The bulbs are similar to scallions or green onions. The bulbs are rooted in the dirt, just below the surface of the earth. If you are still not sure if you found a ramp, just rip into the leave and take a whiff. You should notice a strong onion scent.

Be warned that the lily of the valley (Convallaria majalis) can have a similar appearance and are poisonous. But the leaf of the lily of the valley does not smell of onions. Lily of the valley also has small white bell shaped flowers.

With the popularity of ramps, they are getting harder and harder to find. Here are a few ways you can get your harvest on and still keep the ramps growing for years to come too. You should only harvest a portion of any items you find foraging and only take what you will use. This will keep this plant growing in your favorite location year after year. You can also leave the roots behind by cutting the roots off of the bulb.

Ramps are very versatile. The bulbs and leaves can be used just like you would onions, green onions, chives and garlic. But the effects are much more flavorful.

After you have harvested the ramps, you should wash them in cold water, rinsing well. Lay them out to dry. Cut off the roots from the end of the bulb. (Tip: Save the rooty ends and plant them in a shady location within your yard for your own sustainable crop.)

Next, separate the white part from the green leaves. Slice up the white portion into sections for use in whatever recipe you choose. The green leaves can be chopped and added to a salad or even puréed into pesto. 

For long term storage:
The white portion of the ramp can be stored in a freezer, in a plastic storage bag for months. This portion can also be pickled. Or the entire harvest can be kept in the refrigerator for a week or so. The green portion does not freeze well, so use when freshly harvested.

Sunday, May 25, 2014

Garden Update: Week of 5/18/2014

Here is what is happening around our yard this past week.

Our trunk load (no joking... a dump truck load) of mulch is placed and spread in all the planting beds and around the garden fence.

Cleaned up a deprived and ignored bed that bordered our beloved neighbors.

Moved a large burning bush that was blocking our mulberry tree. Unearthed some tulip bulbs in the shady spot that we placed the bush. So the tulips had to be relocated to a sunnier spot in the yard. I love how gardening projects just lead into one another!


Cut the grass for the first time this season. We lowered the length down to 2.5 inches as we wanted the sunlight to reach the grass seed we placed last week. Usually we cut the grass at 3 inches.

Time to get planting...
Mojoto mint, lemon balm, lemon mint, rosemary, pineapple sage, lots of lettuce, kale, nasturtium, 4 peppers and 29 tomato plants (I may have gone a little over board), all but 3 tomato plants were from seed. Hoping to finish up the rest of the garden this week which should go pretty quick as just about everything left is seeds. 

Planted our front door flower pots. Tried the "thriller, spiller and filler method" with the artistic suggestions from my youngest daughter. In this method, there's one tall, eye-catcher, a creeping/vine variety and a species that fills in nicely - all in the same pot! We are hoping get bigger, as long as the deer stay off them.


We attempted to find morels on 2 hikes in the area, but were disappointed. We can't even seem to find any remnants of where they were picked. But lucky we spotted ramps. Everyone in the family helped harvest 2 shopping bags full. The final weight was 2 and a half pounds after removing the leaves and roots. Look for our next post on spotting and using ramps.


Here is what else you might have missed for the week:

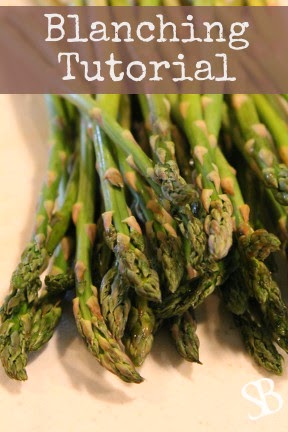
http://www.sustainableblessings.com/2014/05/blanching-tutorial.htmlhttp://www.sustainableblessings.com/2014/05/morel-asparagus-quiche.html

Saturday, May 10, 2014

Preserving Morel Mushrooms

You found them! The elusive prized mushroom known as the... Morel Mushroom. Here is how to keep these prized beauties to enjoy them all year long.


There are a few maintenance things to be done before you enjoy your lucky finds.
  • First things first...If there is any question about the type of mushroom you just picked, do not eat it! Check out my tutorial on how to find Morel Mushrooms.
  • Secondly, be aware that morels contain small amounts of hydrazine toxin that is removed through cooking. Do not eat morel mushrooms raw, ever.
  • And of course be aware the you just picked food from the ground, out in nature. That means not only is there dirt on the morel but there could also be other living things on it as well, like bugs or small slugs. To remove these items from the mushroom simply sprinkle them with salt and then cover with cold water. Place the mushrooms into the refrigerator for about 8 hours or overnight to remove anything unwanted.


On to how to prepare these gems. One of the best and simplest ways to enjoy morels is by gently sauteing them in butter with a little fresh ground pepper and a sprinkling of salt.


Or you could soak the mushrooms in an egg batter and bread them with flour, then fry them up. If you slice the mushroom length wise and then bread and flour, the outline resembles a fish. Another common name for morel mushrooms are dryland fish.

If you are not planning on eating your morels right away you can explore the following preserving ideas:
  • Freezing:
    • The morels can frozen through a method called flash freezing. You can do this by running the mushrooms under cold water or soaking them in a bowl of ice water for a few minutes. Then place them on a cookie sheet or pizza pan and place into a freezer. After the mushrooms are frozen, place them in a labeled container or freezer-safe plastic bag.
  • Drying / Dehydrating: (the method I use most)
    • Drying is the most popular method of long-term storage and are sold this in this fashion commercially. When I dry morels, I like to chop them prior to drying as then they will be recipe ready. 
    • Place mushrooms in a single layer on the dehydrator pans. Set your dehydrator to 130° F for 10-12 hours.
    • Dried morels can be reconstituted by soaking in warm water or milk.
  • Canning:
    • Canning is not recommended because the canning pressure and temperature destroys much of the flavor.
In a post coming soon is a delicious recipe for using your morels.

Tuesday, April 22, 2014

Morel Mushroom Hunting

With the passage of winter comes wet soggy ground, which are perfect conditions for mushroom growth. In our area there is one mushroom that creates a mad dash to collect it: the Morel.

This beauty was growing in our raspberry patch.
This mushroom is one of the greats! Morel mushrooms can be hard to find and have a short window of time for harvesting. The work is worth it, they are very flavorful and thus used in many tasty gourmet recipes.

If you know where to look, you can find them for free! Just think that this delicacy could be growing in your area, just waiting for the picking. Here are a few helpful tips for you to succeed on your mushroom hunt.

Be Safe
Be aware that morels contain small amounts of hydrazine toxin that is removed through cooking.
Do not eat morel mushrooms raw, ever.

Always be 100% certain of the edible type of mushroom you pick as they often have look alikes that can be poisonous. When in doubt, throw it out - do not eat.

ForagingGuide.com is a very helpful site with background on Morel mushrooms and best times of year to go looking, and what to look for.

Know the Morel's characteristics
Morels are very distinctive mushrooms that have a honeycomb-like upper portion with ridges with pits between them. The coloring range from yellow to gray-black in color, depending on the variety you find. Here in Southeastern Wisconsin, we have mostly yellow or black morels.

The best places to find Morels
Morels are commonly found under deciduous trees (trees that have leaves). If the tree is dead or dying it is all the better for morel hunting. Trees to look for are ash, oak, cottonwoods or old apple trees. These are not strict rules on where to find morels. Keep your eyes open when hunting, we had 2 morels growing on southern (sunny) side of our house right out in the grass.

Harvesting
Gently hold the base of the mushroom and twist off the ground. Or you can cut the mushroom at the ground level. Note that you do not want to take the roots. You will not want to eat the soil covered root and by leaving the root behind, some people believe that more morels will grow there in the future. And keep your spot a secret so others don't beat you to the goods next season!

Happy Hunting!